fbpx
Sigmoidal
  • Home
  • LinkedIn
  • About me
  • Contact
No Result
View All Result
  • Português
  • Home
  • LinkedIn
  • About me
  • Contact
No Result
View All Result
Sigmoidal
No Result
View All Result

Real-time Human Pose Estimation using MediaPipe

In this tutorial, you will get to know the MediaPipe library and develop a Python code capable of estimating human poses from images.

Carlos Melo by Carlos Melo
September 11, 2023
in Computer Vision
0
512
SHARES
17.1k
VIEWS
Share on LinkedInShare on FacebookShare on Whatsapp

Have you ever noticed the precision and rhythmic control in Tiger Woods’ swing in golf? Or the meticulous preparation of Roberto Carlos, adjusting the ball before firing a left-footed cannon in soccer?

Training for any sport requires discipline, dedication, and a lot of repetition. It’s not just about learning the rules or techniques, but refining skills to execute perfect movements.

My old coach at the Air Force Academy used to say, “only repetition, to exhaustion, leads to perfection”.

But to correct a wrong move, I first need to know where I’m going wrong. That’s where high-performance coaches come in, using videos to fine-tune their athletes’ performances.

Example of Pose Estimation during Theo’s training.

Inspired by Theo’s judo training, and as a Computer Vision Engineer, I thought: why not create a visual application for high-performance athlete pose estimation?

Welcome to the world of human pose estimation! In this tutorial, you will get to know the MediaPipe library and learn how to detect body joints in images.

Click here to download the source code to this post

What is Pose Estimation?

Imagine teaching a computer to recognize (and understand) human poses, just as a human would. With Human Pose Estimation (HPE), we can achieve just that.

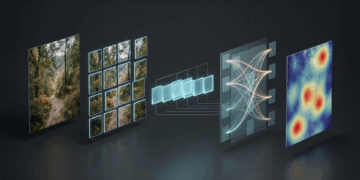
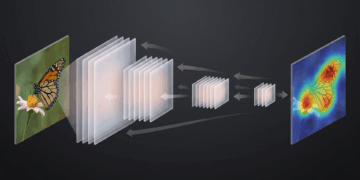
Leveraging the power of machine learning (ML) and computer vision, we can accurately estimate the positions of body joints, such as shoulders, elbows, wrists, hips, knees, and ankles.

In the sports realm, this technology is very relevant in overseeing and improving posture during physical activities, helping both in injury prevention and in enhancing athletic performance.

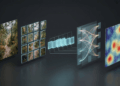
But that’s just one application possibility. Here are some others, directly sourced from Google Developers’ website.

Applications of Pose Estimation

In terms of physiotherapy, for example, accurate identification of movements and postures plays a crucial role, facilitating the monitoring of patients’ progress and providing instant feedback during the rehabilitation process.

In the entertainment sector, augmented and virtual reality applications benefit greatly from this technology, providing a more natural and intuitive user interaction. Just look at the hype created by the Pokemon Go game, or more recently, by Apple Vision Pro.

Pose estimation techniques also have promising applications in behavioral analysis, surveillance systems, gesture recognition, and human-computer interaction, creating a field of possibilities yet to be explored.

What is MediaPipe?

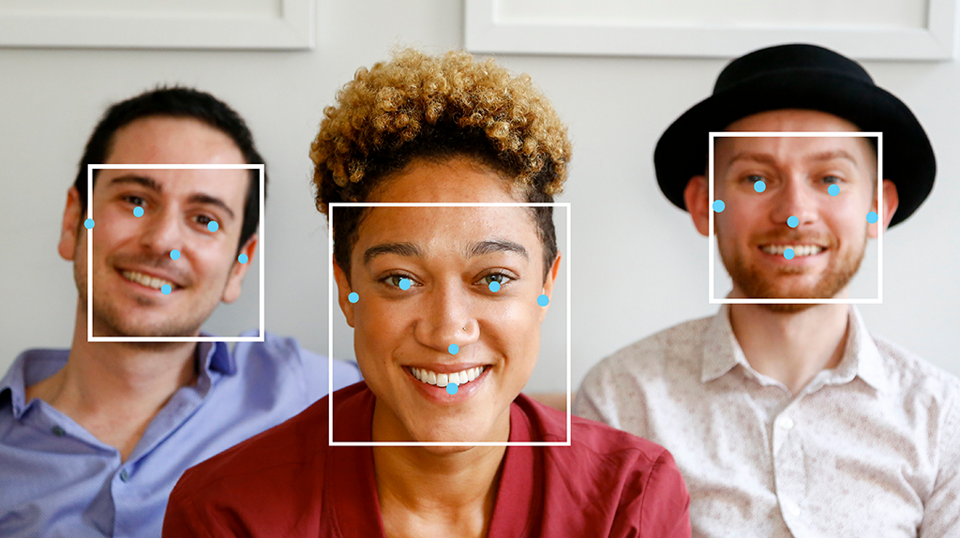
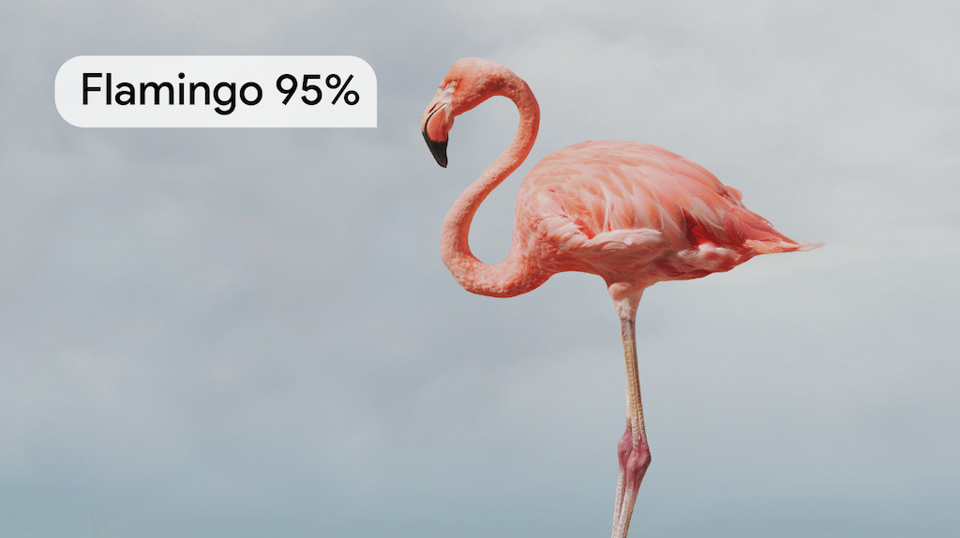
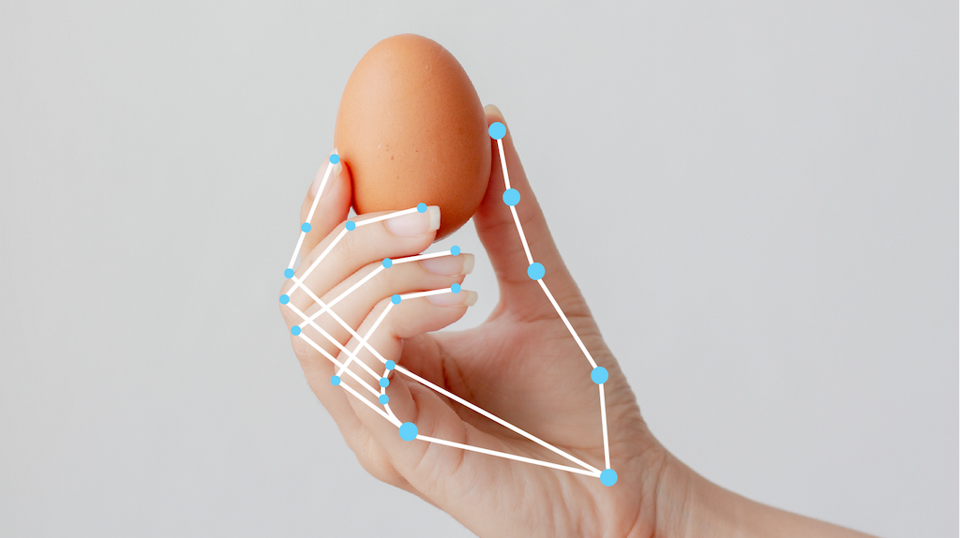
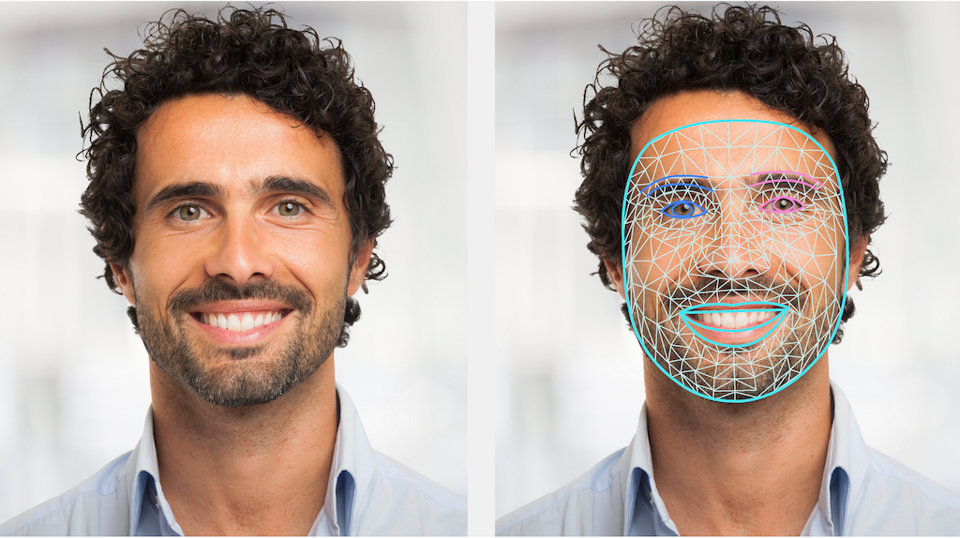
MediaPipe is an open-source platform maintained by Google, offering a comprehensive set of tools, APIs, and pre-trained models that make building applications for tasks like pose estimation, object detection, facial recognition, and more, easier than ever.

Being cross-platform, you can build pipelines on desktops, servers, iOS, Android, and embed them on devices like Raspberry Pi and Jetson Nano.

MediaPipe Framework

The MediaPipe Framework is a low-level component used for constructing efficient Machine Learning (ML) pipelines on devices. It has foundational concepts such as packages, graphs, and calculators that pass, direct, and process data respectively. Written in C++, Java, and Obj-C, the framework consists of the following APIs:

  1. Calculator API (C++)
  2. Graph construction API (Protobuf)
  3. Graph Execution API (C++, Java, Obj-C)

MediaPipe Solutions

MediaPipe Solutions, on the other hand, is a set of ready-made solutions, open-source code examples based on a TensorFlow model.

These solutions are perfect for developers who want to quickly add ML capabilities to their apps without having to build a pipeline from scratch. Ready-made solutions are available in C++, Python, Javascript, Android, iOS, and Coral. Check out the gallery below for the available solutions.


1 of 9
- +

1. Detecção de Objetos

2. Detecção de Rostos

3. Classificação de Imagens

4. Marcação de Mãos

5. Detecção de Marcadores Faciais

6. Segmentação de Imagens

7. Incorporação de Imagens

8. Segmentação Interativa

9. Detecção de Marcadores de Pose

MediaPipe Practical Project

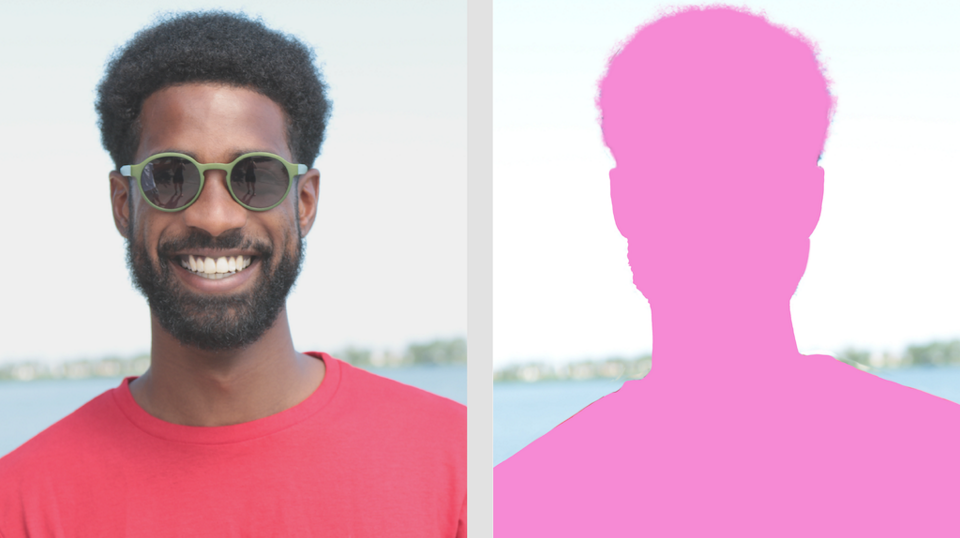
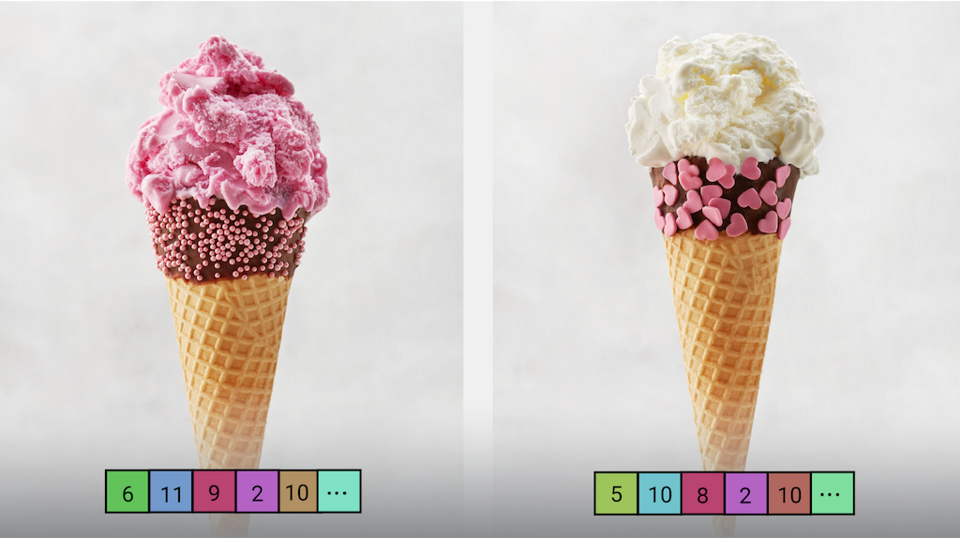
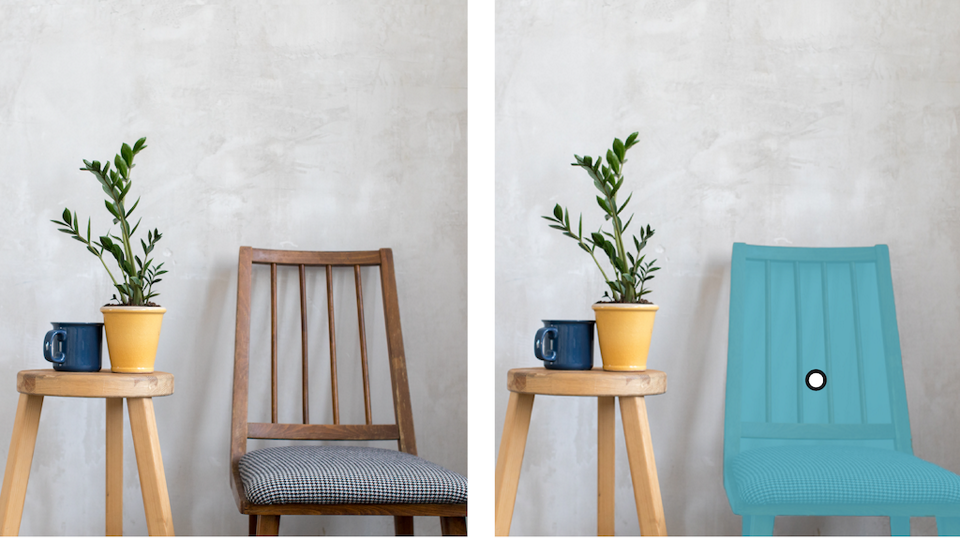
The MediaPipe Pose models can be divided into three main categories: skeleton-based, contour-based, and volume-based.

  1. Skeleton-based Model
  2. Contour-based Model
  3. Volume-based Model

MediaPipe Pose adopts the skeleton-based approach, using the topology of 33 landmarks, known as landmarks, derived from BlazePose.

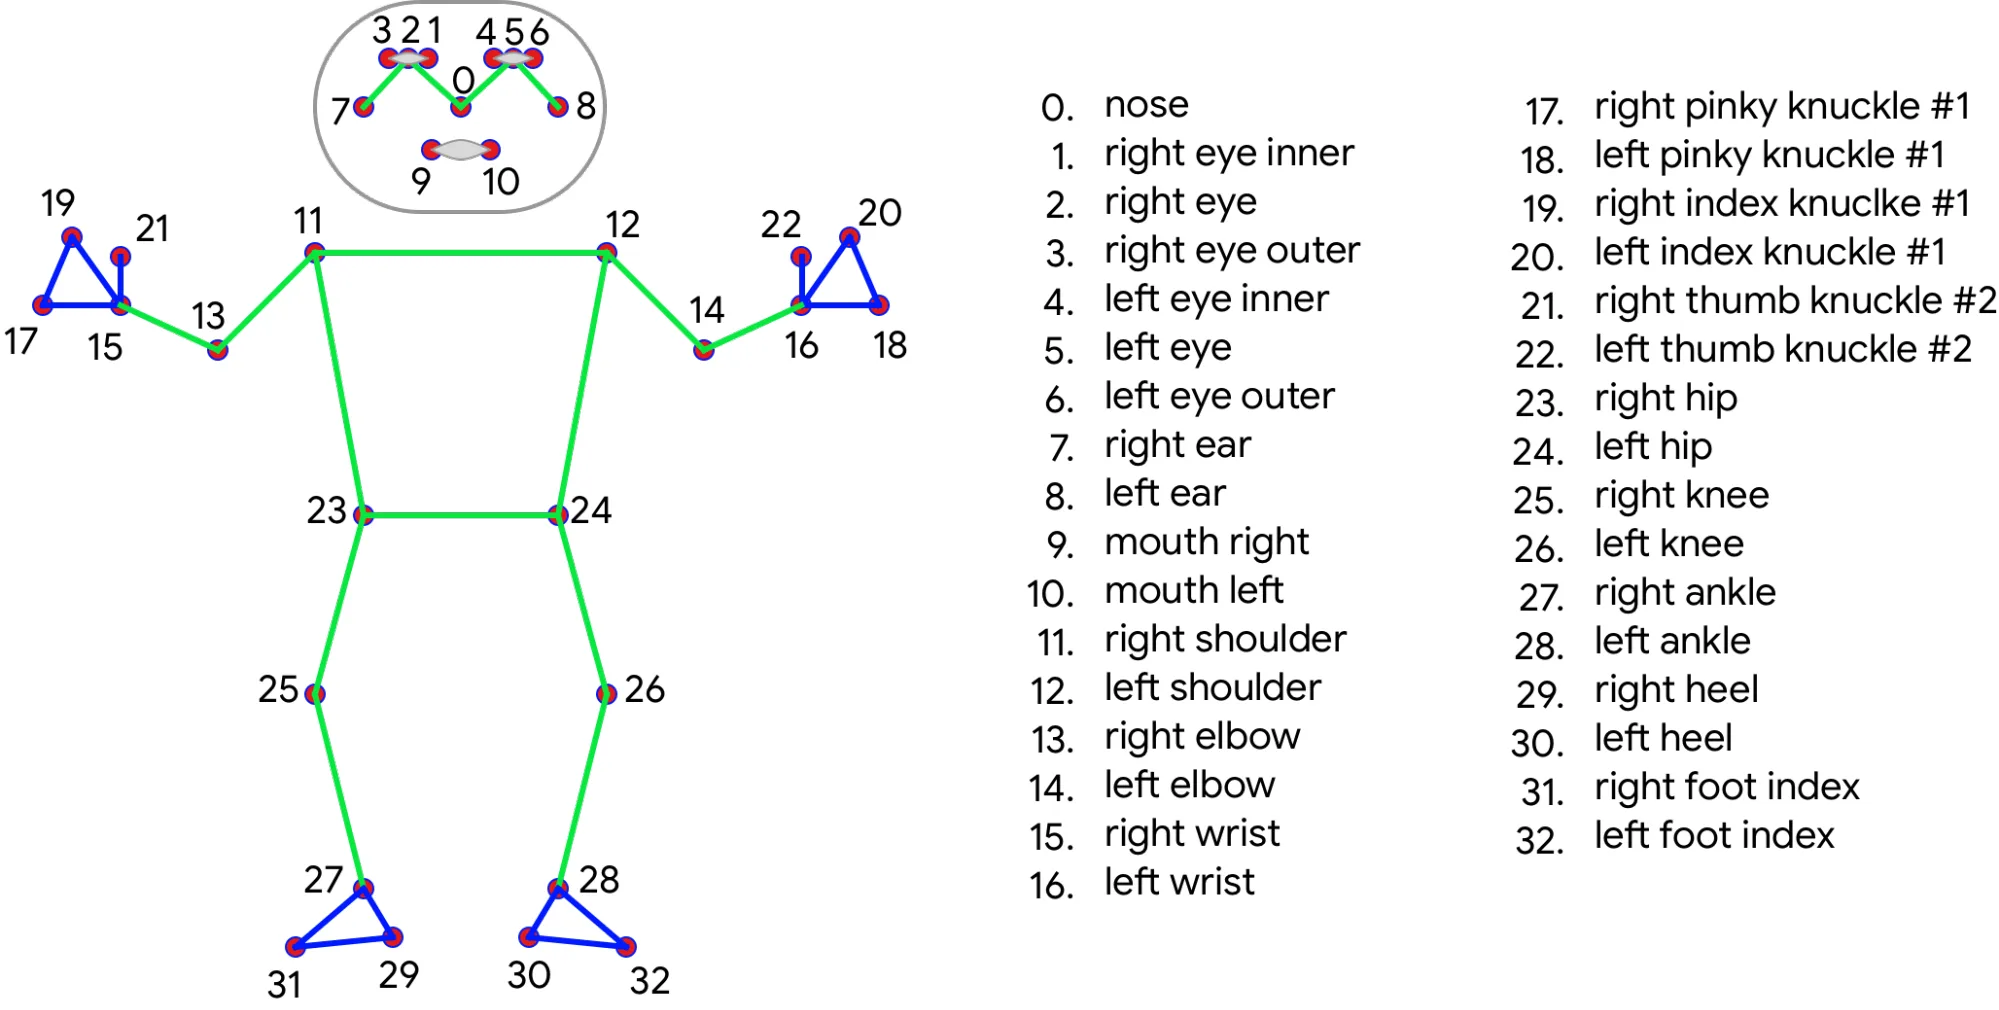
In our context, MediaPipe Pose adopts the skeleton-based approach, utilizing the topology of 33 markers, known as landmarks, derived from BlazePose.

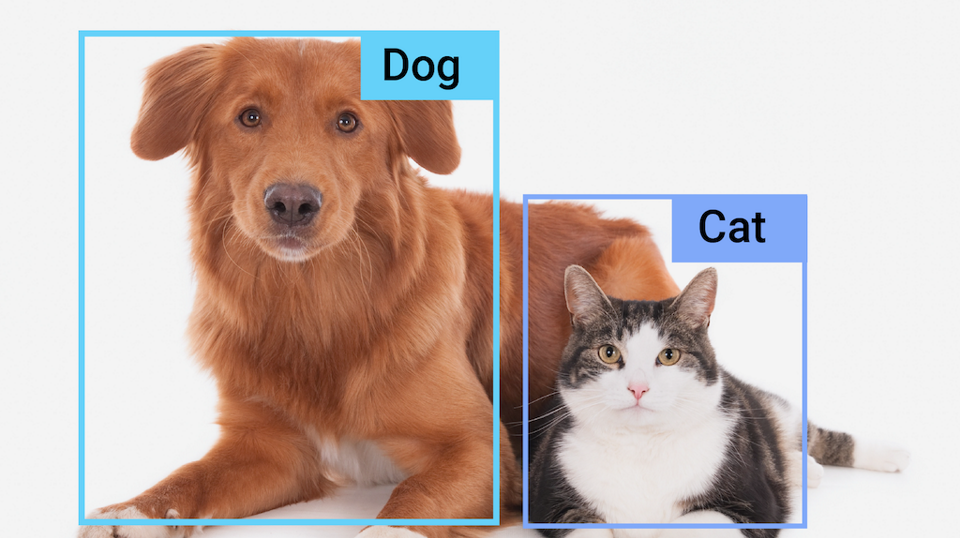
It is also worth noting that, unlike models like YOLOv8 or YOLO-NAS which were structured for detecting multiple people, MediaPipe Pose is a framework aimed at pose estimation for a single person.

Prerequisites

Now, let’s learn in practice how to estimate poses in images using a ready-made MediaPipe model. All materials and code used in this tutorial can be downloaded for free.

The libraries that will be used are OpenCV and MediaPipe. Use the requirements.txt file (provided in the code folder) to proceed.

pip install -r requirements.txt

After executing the code block above, all the necessary dependencies for the project will be conveniently installed.

# required libraries
import cv2
import mediapipe as mp
import matplotlib.pyplot as plt

First, we import the required libraries. The cv2 library is used for image processing and manipulation, while mediapipe is the Python package that provides the MediaPipe framework for pose estimation. Additionally, we import matplotlib.pyplot to visualize the results later on.

Now that we have imported the required libraries, we can move on to the next steps in our pose estimation pipeline. Python solutions are very straightforward. For the Pose Estimation task, we will follow these steps:

  1. Detect and draw pose landmarks
  2. Draw landmark connections
  3. Get the coordinate pixel of the landmark

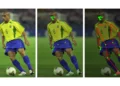
Step 1: Detect and draw pose landmarks

In this step, we will identify the key body points, or landmarks, and draw them on our images and videos for a more intuitive visualization.

# Loading the image using OpenCV.
img = cv2.imread("roberto-carlos-the-best-in-the-world.jpg")

# Getting the image's width and height.
img_width = img.shape[1]
img_height = img.shape[0]

# Creating a figure and a set of axes.
fig, ax = plt.subplots(figsize=(10, 10))
ax.axis('off')
ax.imshow(img[...,::-1])
plt.show()

First, the code loads an image using OpenCV’s imread function. The image file, named “roberto-carlos-the-best-in-the-world.jpg” which is located in the file folder, is read and stored in the img variable.

Next, the code retrieves the image’s width and height using the shape attribute of the img array. The width is assigned to the img_width variable and the height to the img_height variable.

After that, a figure and a set of axes are created using plt.subplots. The figsize parameter sets the figure size to 10×10 inches. The line ax.axis('off') removes axis labels and ticks from the graph. Finally, the image is displayed on the axes using ax.imshow, and plt.show() is called to render the graph.

# Initializing the Pose and Drawing modules of MediaPipe.
mp_pose = mp.solutions.pose
mp_drawing = mp.solutions.drawing_utils

The code initializes two modules from the MediaPipe framework: mp_pose and mp_drawing.

The mp_pose module provides functionality for pose estimation. It contains pretrained models and algorithms that can detect and track human body poses in images or videos. This module is crucial for performing pose estimation tasks using MediaPipe.

The mp_drawing module, on the other hand, provides utilities for drawing the detected poses on images or videos. It offers functions to overlay pose landmarks and connections on visual media, making it easier to view and interpret the pose estimation results.

with mp_pose.Pose(static_image_mode=True) as pose:
    """
    This function utilizes the MediaPipe library to detect and draw 'landmarks'
    (reference points) on an image. 'Landmarks' are points of interest
    that represent various body parts detected in the image.

    Args:
        static_image_mode: a boolean to inform if the image is static (True) or sequential (False).
    """

    # Make a copy of the original image.
    annotated_img = img.copy()

    # Processes the image.
    results = pose.process(img)

    # Set the circle radius for drawing the 'landmarks'.
    # The radius is scaled as a percentage of the image's height.
    circle_radius = int(.007 * img_height)

    # Specifies the drawing style for the 'landmarks'.
    point_spec = mp_drawing.DrawingSpec(color=(220, 100, 0), thickness=-1, circle_radius=circle_radius)

    # Draws the 'landmarks' on the image.
    mp_drawing.draw_landmarks(annotated_img,
                              landmark_list=results.pose_landmarks,
                              landmark_drawing_spec=point_spec)

Let’s break down this code block and understand how it functions.

The code block begins with a with statement that initializes the mp_pose.Pose class from MediaPipe. This class is responsible for detecting and drawing landmarks (key points) on an image. The static_image_mode argument is set to True to indicate that the image being processed is static.

Next, a copy of the original image is made using img.copy(). This ensures that the original image remains unmodified during the annotation process.

The pose.process() function is then called to process the image and obtain the pose estimation results. The results contain the detected pose landmarks.

The code sets the circle’s radius used to draw the landmarks based on a percentage of the image’s height. This ensures the circle size is proportionate to the image size.

A point_spec object is created using mp_drawing.DrawingSpec to specify the drawing style of the landmarks. It defines the color, thickness, and circle’s radius of the drawn landmarks.

Lastly, mp_drawing.draw_landmarks() is invoked to draw the landmarks on annotated_img using the specified style and the landmarks obtained from the results.

This code block showcases how to use MediaPipe to detect and draw landmarks on an image. It provides a visual representation of the detected pose, enabling us to analyze and interpret the pose estimation results.

Step 2: Draw landmarks connection

In addition to detecting individual landmarks, MediaPipe also allows drawing connections between them, enhancing the understanding of the overall posture.

# Make a copy of the original image.
annotated_img = img.copy()

# Specifies the drawing style for landmark connections.
line_spec = mp_drawing.DrawingSpec(color=(0, 255, 0), thickness=2)

# Draws both the landmark points and connections.
mp_drawing.draw_landmarks(
annotated_img,
landmark_list=results.pose_landmarks,
connections=mp_pose.POSE_CONNECTIONS,
landmark_drawing_spec=point_spec,
connection_drawing_spec=line_spec
)

First, a copy of the original image is created. Then, the style for drawing connections between landmarks is specified using the mp_drawing.DrawingSpec class, with the color green and a thickness of 2. Afterwards, the function mp_drawing.draw_landmarks is called to draw both the landmark points and the connections on the annotated image. It receives the annotated image, the pose landmark list from the results object, the predefined connections of mp_pose.POSE_CONNECTIONS, and the drawing specifications for the landmarks and connections.

Step 3: Get the pixel coordinate of the landmark

Now we can extract the pixel coordinates corresponding to each landmark, allowing for more detailed analysis. These pixel coordinates, when used in conjunction with the connections between landmarks, can be extremely helpful in understanding the position and orientation of various body parts in an image. Moreover, these coordinates can be used to calculate more complex metrics such as the ratio between different body parts, which can be helpful in many applications, such as biomechanical analysis, virtual avatar creation, animation, and more.

# Select the coordinates of the points of interest.
l_knee_x = int(results.pose_landmarks.landmark[mp_pose.PoseLandmark.LEFT_KNEE].x * img_width)
l_knee_y = int(results.pose_landmarks.landmark[mp_pose.PoseLandmark.LEFT_KNEE].y * img_height)

l_ankle_x = int(results.pose_landmarks.landmark[mp_pose.PoseLandmark.LEFT_ANKLE].x * img_width)
l_ankle_y = int(results.pose_landmarks.landmark[mp_pose.PoseLandmark.LEFT_ANKLE].y * img_height)

l_heel_x = int(results.pose_landmarks.landmark[mp_pose.PoseLandmark.LEFT_HEEL].x * img_width)
l_heel_y = int(results.pose_landmarks.landmark[mp_pose.PoseLandmark.LEFT_HEEL].y * img_height)

l_foot_index_x = int(results.pose_landmarks.landmark[mp_pose.PoseLandmark.LEFT_FOOT_INDEX].x * img_width)
l_foot_index_y = int(results.pose_landmarks.landmark[mp_pose.PoseLandmark.LEFT_FOOT_INDEX].y * img_height)

# Print the coordinates on the screen.
print('Left knee coordinates: (', l_knee_x,',',l_knee_y,')' )
print('Left ankle coordinates: (', l_ankle_x,',',l_ankle_y,')' )
print('Left heel coordinates: (', l_heel_x,',',l_heel_y,')' )
print('Left foot index coordinates: (', l_foot_index_x,',',l_foot_index_y,')' )

The above code block highlights the extraction and printing of specific landmark coordinates from the pose estimation results.

Firstly, the code calculates the x and y coordinates of four points of interest (left knee, left ankle, left heel, and left foot index). It should be noted that each landmark has a specific number according to the BlazePose model.

Left knee coordinates: ( 554 , 747 )
Left ankle coordinates: ( 661 , 980 )
Left heel coordinates: ( 671 , 1011 )
Left foot index coordinates: ( 657 , 1054 )

Next, we multiply the normalized positions of the landmarks by the width and height of the image. These coordinates are then printed on the screen using print statements.

# Displaying a graph with the selected points.
fig, ax = plt.subplots()
ax.imshow(img[:, :, ::-1])
ax.plot([l_knee_x, l_ankle_x, l_heel_x, l_foot_index_x], [l_knee_y, l_ankle_y, l_heel_y, l_foot_index_y], 'ro')
plt.show()

Lastly, the four points of interest are plotted on the graph as red points using ax.plot and the graph is displayed using plt.show().

Conclusion

In this tutorial, we explored the concept of pose estimation with MediaPipe. We learned about MediaPipe, a powerful framework for building multimodal perceptual pipelines, and how it can be used for human pose estimation.
We covered the basic concepts of pose estimation in images and discussed how to interpret the output. Specifically, we saw that:

  • MediaPipe is a versatile framework for building perceptual pipelines.
  • Pose estimation allows us to track and analyze a person’s pose in an image or video.
  • MediaPipe’s pose estimation models provide coordinates for various body parts, enabling applications in fields like fitness tracking, augmented reality, and more.

In a future tutorial, I’ll teach you how to apply these concepts to videos to calculate trajectories and angles among certain body parts.

Share36Share205Send
Previous Post

What is Computer Vision and How does it work?

Next Post

Learn Camera Calibration using OpenCV

Carlos Melo

Carlos Melo

Computer Vision Engineer with a degree in Aeronautical Sciences from the Air Force Academy (AFA), Master in Aerospace Engineering from the Technological Institute of Aeronautics (ITA), and founder of Sigmoidal.

Related Posts

Blog

What is Sampling and Quantization in Image Processing

by Carlos Melo
June 20, 2025
Como equalizar histograma de imagens com OpenCV e Python
Computer Vision

Histogram Equalization with OpenCV and Python

by Carlos Melo
July 16, 2024
How to Train YOLOv9 on Custom Dataset
Computer Vision

How to Train YOLOv9 on Custom Dataset – A Complete Tutorial

by Carlos Melo
February 29, 2024
YOLOv9 para detecção de Objetos
Blog

YOLOv9: A Step-by-Step Tutorial for Object Detection

by Carlos Melo
February 26, 2024
Depth Anything - Estimativa de Profundidade Monocular
Computer Vision

Depth Estimation on Single Camera with Depth Anything

by Carlos Melo
February 23, 2024
Next Post

Learn Camera Calibration using OpenCV

Leave a Reply Cancel reply

Your email address will not be published. Required fields are marked *

  • Trending
  • Comments
  • Latest
Estimativa de Pose Humana com MediaPipe

Real-time Human Pose Estimation using MediaPipe

September 11, 2023
ORB-SLAM 3: A Tool for 3D Mapping and Localization

ORB-SLAM 3: A Tool for 3D Mapping and Localization

April 10, 2023

Build a Surveillance System with Computer Vision and Deep Learning

1
ORB-SLAM 3: A Tool for 3D Mapping and Localization

ORB-SLAM 3: A Tool for 3D Mapping and Localization

1
Point Cloud Processing with Open3D and Python

Point Cloud Processing with Open3D and Python

1

Fundamentals of Image Formation

0

What is Sampling and Quantization in Image Processing

June 20, 2025
Como equalizar histograma de imagens com OpenCV e Python

Histogram Equalization with OpenCV and Python

July 16, 2024
How to Train YOLOv9 on Custom Dataset

How to Train YOLOv9 on Custom Dataset – A Complete Tutorial

February 29, 2024
YOLOv9 para detecção de Objetos

YOLOv9: A Step-by-Step Tutorial for Object Detection

February 26, 2024

Seguir

  • 🐍 PYTHON DO ZERO está de volta!
Agora como curso reconhecido pelo MEC.

Chegou a hora de aprender a habilidade mais poderosa do mercado de trabalho na próxima década.

Se você quer finalmente aprender PYTHON de verdade, sem enrolação e com uma metodologia feita para o mercado, essa é sua chance.

Hoje, comemorando 5 anos do primeiro lançamento da Turma 1, decidi abrir uma exceção histórica.

APRENDA PYTHON DO ZERO! 

🎉Matricule-se agora e garanta a oferta de aniversário do Sigmoidal.
  • 🚀 PROJETO COMPLETO DE DATA SCIENCE (AO VIVO)!

Neste domingo, às 21h, você vai aprender como construir um modelo de precificação de imóveis do zero, usando dados reais e técnicas de Data Science aplicadas ao mercado imobiliário.

Vamos passar pela análise exploratória de dados, entender padrões de preços, criar e validar um modelo de machine learning e discutir como melhorar a acurácia e interpretar os resultados.

💻📊 Uma aula prática e direta para quem quer dominar modelagem preditiva e transformar dados em decisões reais no mercado de imóveis.

>>> LINK NA BIO!

#datascience #cientistadedados #machinelearning
  • 🚀 PYTHON + DATA SCIENCE = Vigilância Aérea em Tempo Real

Treinei uma arquitetura baseada na YOLO (para detecção de objetos) e criei um servidor RTMP com NGINX para conseguir transmitir imagens do DJI Mavic Air 2 e processá-las ao vivo.

Esse projeto é um exemplo de como é possível aprender Data Science na prática!

#datascience #machinelearning #python
  • Até quando você vai continuar estagnado e sem clareza sobre a direção da sua carreira?

A verdade é simples: aprender a programar é a habilidade número um para qualquer profissional hoje, independente da área ou idade.

💻 Saber programar não é exclusividade de quem trabalha em tecnologia.

A pergunta é: você vai continuar no lado de quem espera por soluções prontas e fica preso a tarefas manuais, ou vai migrar para o lado de quem entende a tecnologia e usa programação para crescer, inovar e ganhar vantagem competitiva?

Comece agora. Aprender Python é o primeiro passo para abrir portas que você nem sabia que existiam.

#python #datascience #machinelearning
  • 💰 Você sabe o que faz e quanto ganha um cientista de dados?

Ser Cientista de Dados significa trabalhar com inteligência artificial, estatística e programação para transformar dados em decisões que movimentam negócios e impactam bilhões de pessoas.

É a função que dá vida a recomendações personalizadas, modelos preditivos e sistemas inteligentes que mudam a forma como empresas inovam.

E não é apenas fascinante...

💼💰 É também uma das carreiras mais bem remuneradas da área de tecnologia!

Se você quer uma carreira com futuro, relevância e excelente retorno financeiro, Data Science é o caminho certo!

#cientistadedados #datascience #python
  • Você colocaria fraldas do lado das cervejas no seu supermercado? 🤔

Parece estranho, mas foi exatamente essa descoberta que mudou as vendas do Walmart.

Os cientistas de dados da empresa analisaram milhões de transações com uma técnica de Data Mining que identifica padrões de compra e combinações inesperadas de produtos.

Então, usando algoritmos da Data Science, cruzaram dados de horário, perfil de cliente e itens comprados juntos.

Encontraram algo curioso: homens que passavam no mercado após as 18h para comprar fraldas, muitas vezes no caminho de casa, também compravam cerveja 🍺.

O Walmart testou a hipótese: colocou fraldas perto da seção de cervejas.

O resultado? As vendas de cerveja dispararam. 🚀

Esse é um exemplo clássico de como Data Science gera impacto direto no negócio.

Não é sobre algoritmos complexos apenas; é sobre transformar dados históricos em decisões inteligentes e lucrativas.

#datascience #cientistadedados #machinelearning
  • Conheça as formações da Academia Sigmoidal.

Nossos programas unem rigor acadêmico, prática aplicada e dupla certificação internacional, preparando você para atuar em Data Science, Visão Computacional e Inteligência Artificial com impacto real no mercado.

🤖 Pós-Graduação em Data Science: Forma Cientistas de Dados e Engenheiros de Machine Learning do zero, com Python, estatística e projetos práticos do mundo real.

👁️ Pós-Graduação em Visão Computacional: Especialize-se em processamento de imagens, Deep Learning, redes neurais e navegação autônoma de drones, tornando-se Engenheiro de Visão Computacional ou Engenheiro de Machine Learning.

📊 MBA em Inteligência Artificial: Voltado a profissionais de qualquer área, ensina a aplicar IA estrategicamente em negócios, usando automação, agentes de IA e IA generativa para inovação e competitividade.

Além do título de Especialista reconhecido pelo MEC, você ainda conquista uma Dupla Certificação Internacional com o STAR Research Institute (EUA).

💬 Interessado em dar o próximo passo para liderar no mercado de tecnologia? Me envie uma mensagem e eu te ajudo pessoalmente com a matrícula.

#DataScience #InteligenciaArtificial #VisaoComputacional
  • Treinar um modelo significa encontrar um bom conjunto de parâmetros. Esse conjunto é definido pela função objetivo, também chamada de função de perda. 👀

O gradient descent é o algoritmo que ajusta esses parâmetros passo a passo. Ele calcula a direção de maior inclinação da função de perda e move o modelo para baixo nessa curva. ⬇️

Se o parâmetro é o peso que multiplica X ou o bias que desloca a reta, ambos são atualizados. Cada iteração reduz o erro, aproximando o modelo da solução ótima.

A intuição é simples: sempre que a função de perda é maior, o gradiente aponta o caminho. O algoritmo segue esse caminho até que não haja mais descida possível. 🔄 

#inteligênciaartificial #datascience #machinelearning
  • Qual a melhor linguagem? PYTHON ou R?

Diretamente do túnel do tempo! Resgatei esse vídeo polêmico de 2021, quem lembra??

#DataScience #Python #R #Programação
  • 🎥 Como começar uma CARREIRA como CIENTISTA DE DADOS

Você já pensou em entrar na área que mais cresce e que paga os melhores salários no mundo da tecnologia?

Domingo você vai descobrir o que realmente faz um Cientista de Dados, quais são as habilidades essenciais e o passo a passo para dar os primeiros passos na carreira.

Eu vou te mostrar um mapa para você sair do zero e se preparar para trabalhar com Data Science em 2026.

📅 Domingo, 28 de setembro
🕖 20:00h (horário de Brasília)
🔗 Link nos Stories

Clique no link dos Stories e receba o link da aula ao vivo!

#datascience #machinelearning #cientistadedados
  • VISÃO COMPUTACIONAL está no centro de um dos avanços mais impressionantes da exploração espacial recente: o pouso autônomo da missão Chang’e-5 na Lua. 🚀🌑

Durante a descida, câmeras de alta resolução e sensores a laser capturavam continuamente o relevo lunar, enquanto algoritmos embarcados processavam as imagens em tempo real para identificar crateras e obstáculos que poderiam comprometer a missão.

Esses algoritmos aplicavam técnicas de detecção de bordas e segmentação, aproximando crateras por elipses e cruzando a análise visual com dados de altímetros. Assim, a IA conseguia selecionar regiões planas e seguras para o pouso, ajustando a trajetória da nave de forma autônoma. 

Esse processo foi indispensável, já que a distância entre Terra e Lua gera atraso de comunicação que inviabiliza controle humano direto em tempo real.

Esse caso ilustra como IA embarcada está deixando de ser apenas uma ferramenta de análise pós-missão para se tornar parte crítica das operações espaciais autônomas em tempo real — um passo essencial para missões em Marte, asteroides e no lado oculto da Lua.

(PS: Vi o Sérgio Sacani, do @spacetoday , postando isso primeiro.)

#visaocomputacional #machinelearning #datascience
  • 🔴Aprenda a MATEMÁTICA por Trás do MACHINE LEARNING

Você já se perguntou como as máquinas aprendem?🤖 

A resposta está na matemática que dá vida ao Machine Learning. E neste vídeo, você vai aprender os conceitos fundamentais que sustentam os algoritmos de inteligência artificial, de forma clara e acessível.

Mais do que apenas fórmulas, a ideia é mostrar como cada peça matemática se conecta para transformar dados em aprendizado. Se você deseja compreender a lógica por trás do funcionamento das máquinas, essa aula é um ótimo ponto de partida.

📅 Domingo, 21 de setembro
🕖 20:00h (horário de Brasília)
🔗 Link nos Stories

#machinelearning #datascience #cientistadedados
  • 🚀 As matrículas estão abertas!
Depois de quase 1 ano, a nova turma da Pós-Graduação em Data Science chegou.

NOVIDADE: agora com Dupla Certificação Internacional:
🇧🇷 Diploma de Especialista reconhecido pelo MEC
🇺🇸 Certificado do STAR Research Institute (EUA)

Aprenda Data Science na prática, domine Machine Learning e IA, e conquiste reconhecimento no Brasil e no mundo.

2025 pode ser o ano em que você dá o passo decisivo para se tornar Cientista de Dados.

🔗 Clique no link da bio e reserve sua vaga!
#datascience #cienciadedados #python
  • Por que o CHATGPT MENTE PARA VOCÊ? 🤔

Já percebeu que o ChatGPT às vezes responde com confiança... mas está errado? 

Isso acontece porque, assim como um aluno em prova, ele prefere chutar do que deixar em branco.
Essas respostas convincentes, mas erradas, são chamadas de alucinações.

E o que o pesquisadores da OpenAI sugerem, é que esse tipo de comportamento aparece porque os testes que treinam e avaliam o modelo premiam o chute e punem a incerteza.

Então, da próxima vez que ele ‘inventar’ algo, lembre-se: não é pessoal, ele apenas for treinado dessa maneira!
#inteligênciaartificial #chatgpt #datascience
  • ChatGPT: um "estagiário de LUXO" para aumentar sua produtividade na programação.

 #programacao #copiloto #produtividade #streamlit #dashboard #tecnologia #devlife
  • Da série “Foi a IA que me deu”, vamos relembrar minha viagem pra Tromsø, na Noruega, 500 km acima da linha do Círculo Polar Ártico. 🌍❄️

No vídeo de hoje, você vai aprender o que é um "fiorde"! 

Como você dormia sem saber o que era um fiorde?? 😅
Instagram Youtube LinkedIn Twitter
Sigmoidal

O melhor conteúdo técnico de Data Science, com projetos práticos e exemplos do mundo real.

Seguir no Instagram

Categories

  • Aerospace Engineering
  • Blog
  • Carreira
  • Computer Vision
  • Data Science
  • Deep Learning
  • Featured
  • Iniciantes
  • Machine Learning
  • Posts

Navegar por Tags

3d 3d machine learning 3d vision apollo 13 bayer filter camera calibration career cientista de dados clahe computer vision custom dataset data science deep learning depth anything depth estimation detecção de objetos digital image processing histogram histogram equalization image formation job lens lente machine learning machine learning engineering nasa object detection open3d opencv pinhole projeto python quantization redes neurais roboflow rocket salário sampling scikit-learn space tensorflow tutorial visão computacional yolov8 yolov9

© 2024 Sigmoidal - Aprenda Data Science, Visão Computacional e Python na prática.

Welcome Back!

Login to your account below

Forgotten Password?

Retrieve your password

Please enter your username or email address to reset your password.

Log In

Add New Playlist

No Result
View All Result
  • Home
  • Cursos
  • Pós-Graduação
  • Blog
  • Sobre Mim
  • Contato
  • Português

© 2024 Sigmoidal - Aprenda Data Science, Visão Computacional e Python na prática.