Welcome to this tutorial on ORB-SLAM 3, a powerful tool for 3D mapping and localization. If you’re interested in computer vision, robotics, or simply want to learn more about the latest advancements in SLAM technology, then you’re in the right place.
ORB-SLAM 3 is a state-of-the-art SLAM system that builds on the success of its predecessors, ORB-SLAM and ORB-SLAM 2. It uses a combination of feature-based and direct methods to achieve real-time performance on a variety of platforms. In this tutorial, we’ll walk you through the step-by-step process of implementing ORB-SLAM 3, from installation to running the system on your own data. So, let’s get started!
Applications of Simultaneous Localization and Mapping (SLAM)
SLAM, or Simultaneous Localization and Mapping, is a fundamental problem in computer vision that involves building a map of an unknown environment while simultaneously tracking the position within that environment. This is a challenging problem that requires a combination of sensor fusion, optimization, and machine learning techniques.
SLAM has a wide range of applications in robotics, computer vision, and augmented reality. One of the most common applications of SLAM is in autonomous vehicles, where it is used to build a map of the environment and localize the vehicle within that map. In practice it allows the vehicle to navigate autonomously without human intervention.
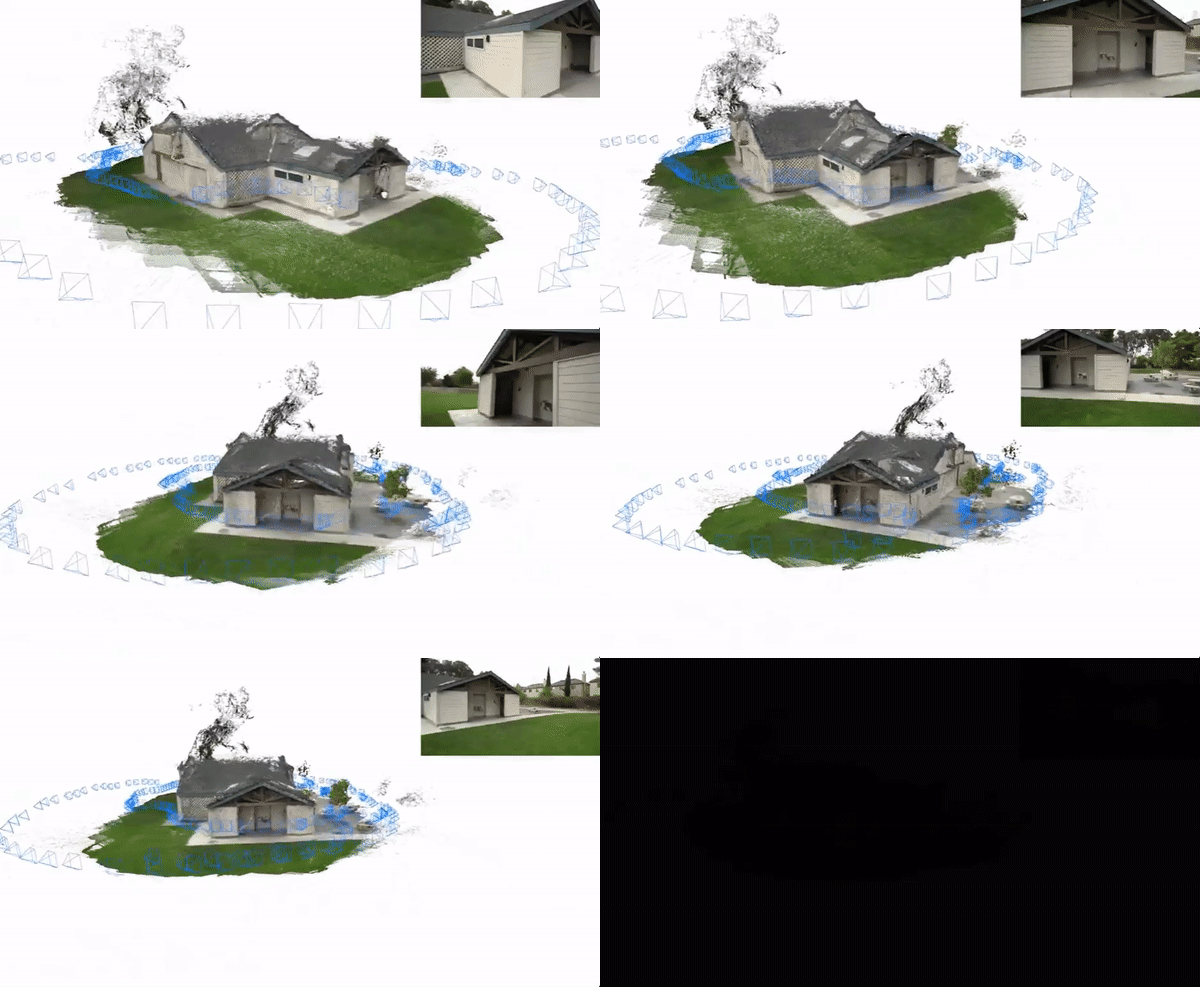
SLAM is also used in the field of augmented reality, where it is used to track the position of a user’s device in real-time and overlay virtual objects onto the real world. This allows for immersive and interactive experiences that blur the line between the digital and physical worlds.
In addition to these applications, SLAM has a wide range of other uses, including in the fields of agriculture, construction, and archaeology. As this technology continues to advance, we can expect to see even more innovative applications in the future.
What is ORB-SLAM?
ORB-SLAM is a state-of-the-art SLAM (Simultaneous Localization and Mapping) system that uses a combination of feature-based and direct methods to achieve real-time performance on a variety of platforms. It was developed by researchers at the University of Zaragoza, Spain, and is now widely used in both academia and industry.
The name ORB-SLAM comes from the fact that it uses Oriented FAST and Rotated BRIEF (ORB) features to detect and match keypoints in images. These features are combined with other techniques, such as loop closing and pose optimization, to achieve robust and accurate localization and mapping.
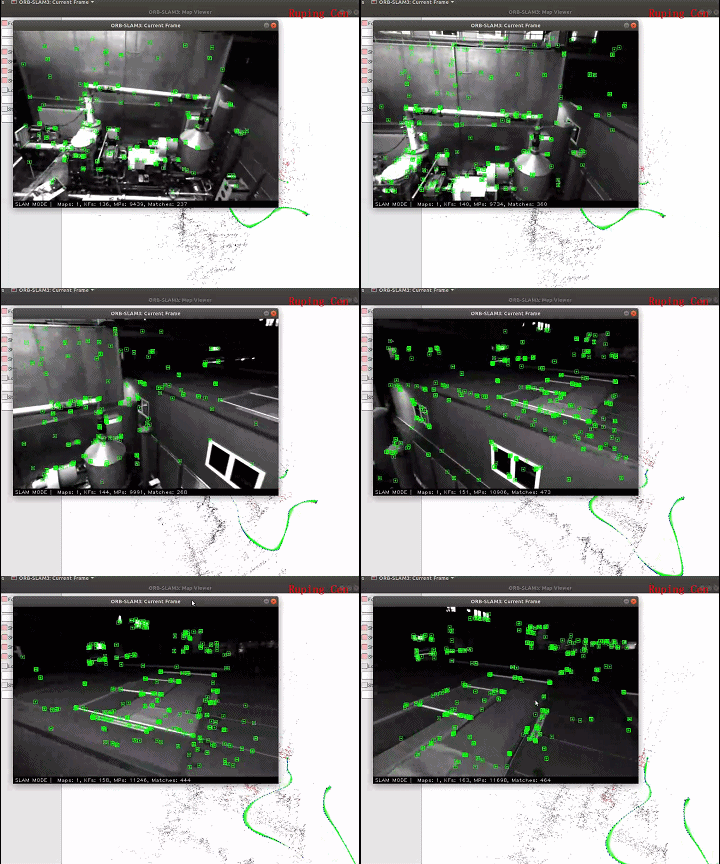
One of the key advantages of ORB-SLAM is its ability to work in real-time on a variety of platforms, including laptops, mobile devices, and even drones. This makes it a versatile tool for a wide range of applications, from autonomous vehicles to augmented reality.
Overall, ORB-SLAM is a powerful and flexible SLAM system that has become a popular choice for researchers and practitioners alike. Its combination of feature-based and direct methods, along with its real-time performance and platform flexibility, make it a valuable tool for anyone working in the field of computer vision or robotics.
Setting up a virtual machine with ORB-SLAM 3
Probably every enthusiast who ventured to try installing any of the ORB-SLAM versions from the instructions on the GitHub repository ended up frustrated after hours or days trying to build and install all the dependencies. The truth is that, as it is a research project on the cutting edge of knowledge and recent, it requires specific versions of its dependencies to be installed. This also applies to the operating system that should be used.
In my specific case, I have a MacBook Pro (Intel chip), and I had to create a virtual machine with Ubuntu. Even then, I had to test three different versions to find one where I could successfully compile and run on a test dataset.
If you search around, you will find instructions that claim it is possible to compile on macOS or Ubuntu 20.04. However, just take a look at the open issues or even merge requests to see that it’s not that straightforward. After many attempts (and cups of coffee), thanks to a fork of the official repository, I managed to find a sequence that worked without any errors. And that’s what I will teach you below.
The version I had success with was Ubuntu 18.04. We will use a freshly installed version from this image. If you wish to use another version, I should warn you that it probably won’t work right away, and you will have to adapt the steps.
Building ORB-SLAM3 library and examples
In this section, we’ll provide a step-by-step guide to implementing ORB-SLAM 3, from installation to running the system on your own data. We’ll cover everything you need to know to get started with ORB-SLAM 3, including how to install the necessary dependencies, how to build the system from source, and how to run the system on your own data.
Attention! Many times we will execute the git checkout command to select specific commits from the dependencies, as well as modify files before building and installing ORB-SLAM3.
$ sudo add-apt-repository "deb http://security.ubuntu.com/ubuntu xenial-security main"
$ sudo apt update
$ sudo apt-get install build-essential cmake git libgtk2.0-dev pkg-config libavcodec-dev libavformat-dev libswscale-dev
$ sudo apt-get install python-dev python-numpy libtbb2 libtbb-dev libjpeg-dev libpng-dev libtiff-dev libdc1394-22-dev libjasper-dev $ libglew-dev libboost-all-dev libssl-dev libeigen3-dev
This particular code block illustrates the installation of the necessary dependencies for building and running ORB-SLAM 3. The first line adds the Ubuntu Xenial Security repository to the list of repositories, which contains the necessary packages for building and running ORB-SLAM 3. The second line updates the package list to include the newly added repository. The third line installs the required dependencies, including build tools, libraries for image and video processing, and the Boost C++ libraries.
$ cd ~
$ mkdir Dev && cd Dev
$ git clone https://github.com/opencv/opencv.git
$ cd opencv
$ git checkout 3.2.0
Here, we have a code segment that illustrates how to download and install OpenCV 3.2.0. The first and second commands change the current directory to the user’s home directory and create a new directory called Dev in the user’s home directory and changes the current directory to that directory. The third command clones the OpenCV repository from GitHub into the current directory. The fourth command checks out a specific version of the library, which is required for building and running ORB-SLAM 3. This version was the only one that really worked for me.
$ gedit ./modules/videoio/src/cap_ffmpeg_impl.hpp
As demonstrated in the code block above, this command opens the “cap_ffmpeg_impl.hpp” file in the videoio module of the OpenCV codebase using the Gedit text editor. This file contains the implementation of the FFmpeg-based video capture functionality used by ORB-SLAM 3. We will modify it in order to enable support for H.264 video encoding, which is required for processing video data from many modern cameras. The modifications involve adding these few lines of code to the header of the file:
#define AV_CODEC_FLAG_GLOBAL_HEADER (1 << 22)
#define CODEC_FLAG_GLOBAL_HEADER AV_CODEC_FLAG_GLOBAL_HEADER
#define AVFMT_RAWPICTURE 0x0020
These lines of code define three constants that are used to modify the FFmpeg-based video capture functionality. The first constant, AV_CODEC_FLAG_GLOBAL_HEADER, is a flag that indicates that the codec should output a global header. The second constant, CODEC_FLAG_GLOBAL_HEADER, is an alias for the first constant. The third constant, AVFMT_RAWPICTURE, is a flag that indicates that the format uses raw picture data.
$ mkdir build
$ cd build
$ cmake -D CMAKE_BUILD_TYPE=Release -D WITH_CUDA=OFF -D CMAKE_INSTALL_PREFIX=/usr/local ..
$ make -j 3
$ sudo make install
After selecting the right version and change the file, the code snippet above demonstrates how to build and install OpenCV 3.2.0 on your system. The first command creates a new directory called “build” and changes the current directory to that directory. The third command configures the build using CMake with specific options, including setting the build type to “Release,” disabling the use of CUDA, and specifying the installation prefix. The fourth command compiles the code using three threads. The fifth command installs the compiled OpenCV on your system.
$ cd ~/Dev
$ git clone https://github.com/stevenlovegrove/Pangolin.git
$ cd Pangolin
$ git checkout 86eb4975fc4fc8b5d92148c2e370045ae9bf9f5d
$ mkdir build
$ cd build
$ cmake .. -DCMAKE_BUILD_TYPE=Release
$ make -j 3
$ sudo make install
The above code snippet demonstrates how to build and install the Pangolin library, which is a lightweight C++ library for displaying 3D graphics and images. Going back from the current directory to the “Dev” directory in the user’s home directory, we clone the Pangolin repository from GitHub into the current directory and check out a specific commit of the code. The following commands create a new directory called “build”, changes the current directory to that directory, run the CMake, compile the code using three threads and install the compiled code on your system.
$ cd ~/Dev
$ git clone https://github.com/UZ-SLAMLab/ORB_SLAM3.git
$ cd ORB_SLAM3
$ git checkout ef9784101fbd28506b52f233315541ef8ba7af57
The moment we have all been waiting for! These commands above clone the ORB-SLAM 3 repository from GitHub and check out a specific commit of the code that worked for me. The first command changes the current directory to the “Dev” directory in the user’s home directory. The second command clones the ORB-SLAM 3 repository from GitHub into the current directory. The third command changes the current directory to the newly cloned ORB-SLAM 3 repository.
$ gedit ./include/LoopClosing.h
In this code block, we can see that the gedit command is used to open the “LoopClosing.h” file. This file contains the implementation of the loop closing functionality, which is responsible for detecting and correcting loop closures in the SLAM system and needs to be modified. In file ./include/LoopClosing.h (at line 51) change the line from:
Eigen::aligned_allocator<std::pair<const KeyFrame*, g2o::Sim3> > > KeyFrameAndPose;to:
Eigen::aligned_allocator<std::pair<KeyFrame *const, g2o::Sim3> > > KeyFrameAndPose;This adjustment ensures successful compilation. After this change, we can compile ORB-SLAM3 and its dependencies, such as DBoW2 and g2o.
$ ./build.sh
Let’s explore this piece of code and understand what’s going on. This command runs the “build.sh” script, which is a shell script that builds and installs ORB-SLAM 3 on your system. The script runs several commands, including building and installing some thirds dependencies.
In fact, I read that it might not work on the first try, and it may be necessary to run $ ./build.sh one or two more times (I didn’t need to).
Obtaining the EuRoc Dataset for Testing
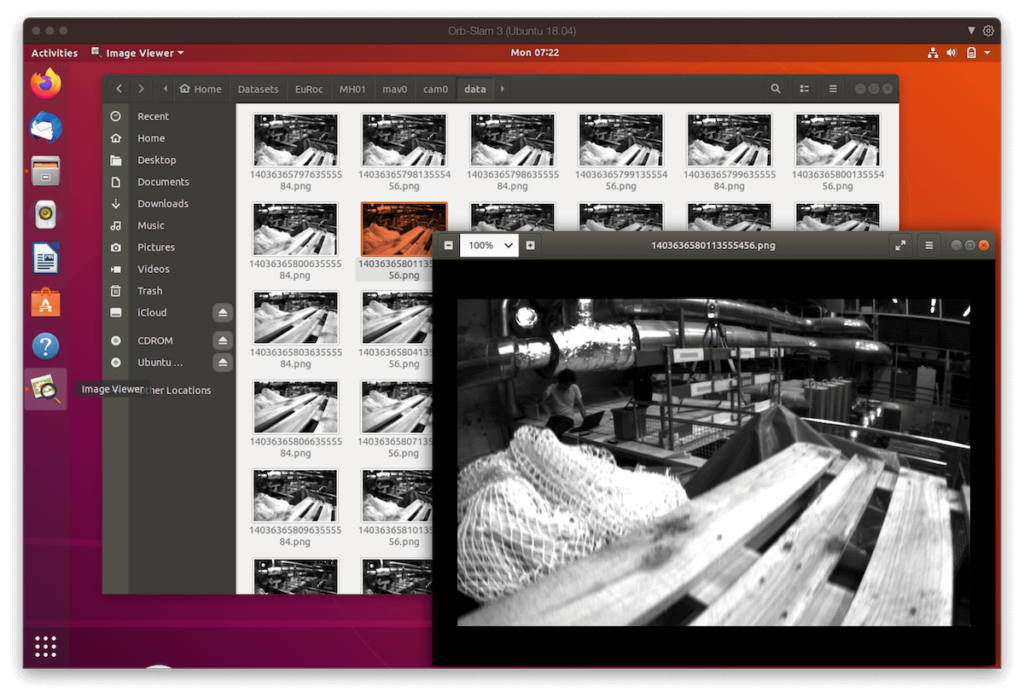
To test the ORB-SLAM 3 system, we need a dataset of real-world images and camera poses. In this section, we’ll download and prepare the EuRoc dataset, which is a popular dataset for testing visual SLAM systems.
cd ~
mkdir -p Datasets/EuRoc
cd Datasets/EuRoc/
wget -c http://robotics.ethz.ch/~asl-datasets/ijrr_euroc_mav_dataset/machine_hall/MH_01_easy/MH_01_easy.zip
mkdir MH01
unzip MH_01_easy.zip -d MH01/
Here, we have a code segment that illustrates how to download and prepare the EuRoc dataset for testing ORB-SLAM 3. The first command changes the current directory to the user’s home directory. The second command creates a new directory called “Datasets/EuRoc” in the user’s home directory. The third command changes the current directory to the newly created “Datasets/EuRoc” directory. The fourth command downloads the “MH01easy.zip” file from the EuRoc dataset website. The fifth command creates a new directory called “MH01” in the current directory. The sixth command unzips the downloaded file into the newly created “MH01” directory. This code segment is necessary for obtaining and preparing the EuRoc dataset for testing ORB-SLAM 3.
$ cd ~/Dev/ORB_SLAM3
$ ./Examples/Monocular/mono_euroc ./Vocabulary/ORBvoc.txt ./Examples/Monocular/EuRoC.yaml ~/Datasets/EuRoc/MH01 ./
As we can see from the code above, this command runs the ORB-SLAM 3 system on the EuRoc dataset. The first command changes the current directory to the ORB-SLAM 3 codebase directory. The second command runs the “mono_euroc” example, which is a monocular visual SLAM system designed to work with the EuRoc dataset. The third command specifies the path to the ORB vocabulary file. The fourth command specifies the path to the EuRoc dataset configuration file. The fifth command specifies the path to the EuRoc dataset directory. The sixth command specifies the path to the output directory. This command is necessary for testing the ORB-SLAM 3 system on the EuRoc dataset.
Results and Conclusion
The ORB-SLAM 3 delivers remarkable technical results, providing a comprehensive solution to the SLAM problem. In our case, during the execution process the library displays a window that shows the sequence of images from the EuRoc dataset and tracks the features in real-time. These features, also known as points of interest, are represented by small green trackers that move with the scene as the camera moves.
In addition, ORB-SLAM 3 creates a 3D point cloud that represents the environment map. This point cloud is generated from the features extracted from the images and allows for visualization and analysis of the mapped space. Although ORB-SLAM 3 does not directly generate a 3D mesh from this point cloud, the obtained information can be easily exported and processed by other tools to create a three-dimensional mesh of the environment.
Another important feature is the ability to visualize the estimated camera trajectory in real-time. ORB-SLAM3 provides a separate window that displays the camera trajectory and the covisibility map of keyframes, allowing the user to follow the progress of the algorithm and evaluate the accuracy of the location in relation to the environment.
In summary, ORB-SLAM3 delivers a robust and accurate visual and visual-inertial SLAM solution, providing valuable information about the environment and sensor movement. The library displays tracked features, generates a 3D point cloud, and allows for the visualization of the camera trajectory, making it easy to analyze and apply these data in various contexts and projects.





Meu Deus há tanta coisa que sempre imaginei em fazer e que afinal é possivel com computer vision… os filmes mostram muito estes cenários em que lançam um drone para efetuar o mapeamento da zona em atuação por uma equipa de soldados ou tecnicos em zonas remotas, eu não imaginava que isso já fosse uma realidade.. uau… o filme prometheus mostra isso.