Training YOLOv9 on a custom dataset involves preparing a dataset specific to the detection task and configuring the model parameters.
The process begins with collecting and annotating images that represent the objects of interest, ensuring the model can learn to identify and locate these objects in different conditions.
In this article, we are going to show how to train a YOLOv9 model on a custom dataset. We will walk through an example of training a vision model to detect and track SpaceX launches from raw footage. With that said, you can use any dataset you want with this guide.
Let’s get started!
What is YOLOv9
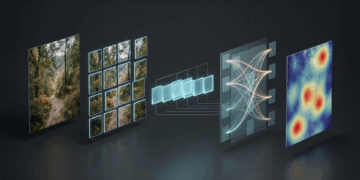
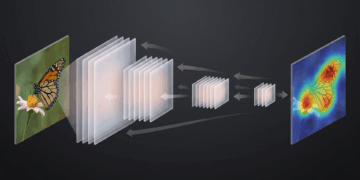
YOLOv9 marks a pivotal development in object detection, integrating Programmable Gradient Information (PGI) to mitigate data transmission losses in deep networks, and Generalized Efficient Layer Aggregation Network (GELAN) to optimize parameter efficiency.
Released on February 21, 2024, by researchers Chien-Yao Wang, I-Hau Yeh, and Hong-Yuan Mark Liao through the paper “YOLOv9: Learning What You Want to Learn Using Programmable Gradient Information”, the new model demonstrated superior accuracy compared to previous YOLO models.
I wrote an introductory article, so if you want to know more technical details about YOLOv9, check out this link.
How to Install YOLOv9
Installing YOLOv9 is not as straightforward as installing packages from PyPI or Conda due to its novelty.
However, to facilitate the installation process and make it accessible to everyone, I have created a fork of the original repository and a Google Colab notebook to guide you.
# Clone the YOLOv9 repository
!git clone https://github.com/carlosfab/yolov9.git

# Change the current working directory to the cloned YOLOv9 repository
%cd yolov9

# Install the necessary YOLOv9 dependencies from the requirements.txt file
!pip install -r requirements.txt -q
Initially, the command !nvidia-smi is executed to verify that a GPU is active and available for use. Following this, the YOLOv9 repository is cloned from GitHub using !git clone https://github.com/carlosfab/yolov9.git.
The subsequent command, %cd yolov9, navigates into the cloned repository’s directory. Lastly, the command !pip install -r requirements.txt -q installs all necessary dependencies listed in the requirements.txt file quietly.
# Imports the necessary libraries
import sys
import os
import requests
from tqdm.notebook import tqdm
from pathlib import Path
from PIL import Image
from io import BytesIO
import matplotlib.pyplot as plt
from matplotlib.pylab import rcParams
from IPython.display import display, Image
from PIL import Image as PILImage


# Configures the directories for code and data
CODE_FOLDER = Path(".").resolve()  # Code directory
WEIGHTS_FOLDER = CODE_FOLDER / "weights"  # Directory for model weights
DATA_FOLDER = CODE_FOLDER / "data"  # Directory for data

# Creates the directories for weights and data, if they don't exist
WEIGHTS_FOLDER.mkdir(exist_ok=True, parents=True)
DATA_FOLDER.mkdir(exist_ok=True, parents=True)

# Adds the code directory to the Python path for importing modules
sys.path.append(str(CODE_FOLDER))
To begin, we import necessary libraries for our project. With the imports completed, we then define the following key variables:
CODE_FOLDER: Specifies the directory path for the code, ensuring all scripts and modules are centrally located for easy access and management.WEIGHTS_FOLDER: Designates a directory for storing model weights.DATA_FOLDER: This directory is identified for storing our data samples. It is used for inference after the custom model has been trained.
# URLs of weight files
weight_files = [
    "https://github.com/WongKinYiu/yolov9/releases/download/v0.1/yolov9-c.pt",
    "https://github.com/WongKinYiu/yolov9/releases/download/v0.1/yolov9-e.pt",
    "https://github.com/WongKinYiu/yolov9/releases/download/v0.1/gelan-c.pt",
    "https://github.com/WongKinYiu/yolov9/releases/download/v0.1/gelan-e.pt"
]

# Iterate over the list of URLs to download the weight files
for i, url in enumerate(weight_files, start=1):
    filename = url.split('/')[-1]
    response = requests.get(url, stream=True)
    total_size_in_bytes = int(response.headers.get('content-length', 0))
    block_size = 1024  # 1 Kilobyte
    with open(WEIGHTS_FOLDER / filename, 'wb') as file:
        for data in response.iter_content(block_size):
            file.write(data)
This code snippet downloads YOLOv9 model weight files from provided URLs. It iterates through the weight_files list, fetching each file via HTTP requests and saving them to the WEIGHTS_FOLDER.
How to Train a YOLOv9 Model on Custom Data
Crafting a custom dataset from scratch, which involves collecting images, annotating them, and formatting them properly, can often be overwhelming and time-consuming, sometimes requiring extensive hours of meticulous work.
Thankfully, Roboflow has revolutionized this daunting task, making it significantly more streamlined and efficient. Let’s explore how this works in practice.
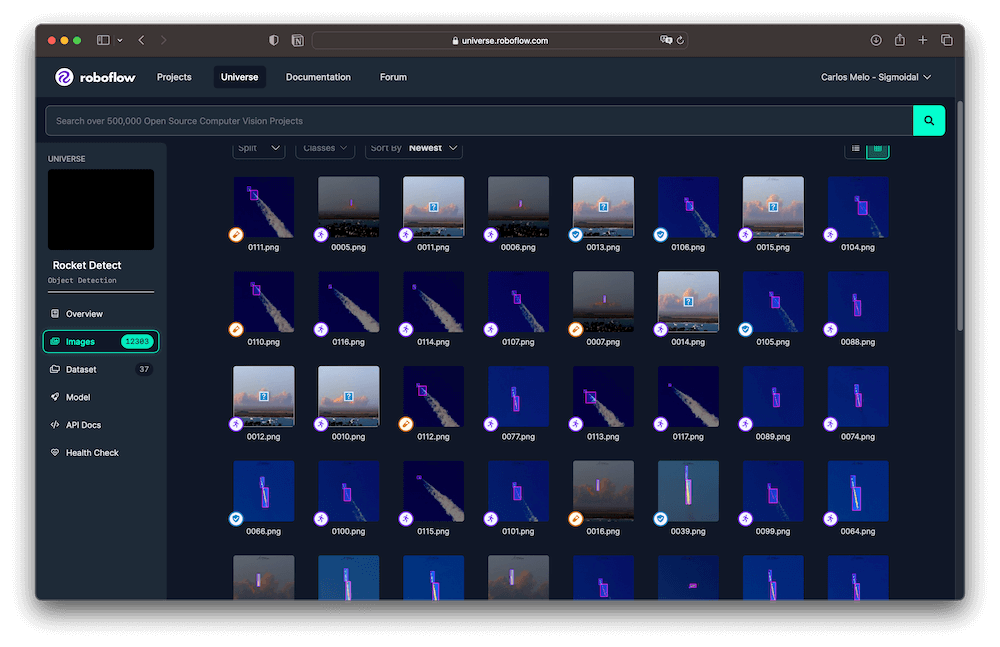
With the Starship Flight 3 mission scheduled for mid-March 2024, it’s the perfect opportunity to add an innovative twist by training a model to monitor spacecraft from launch videos. We will leverage this dataset from Roboflow for training our model.
This dataset is structured into three primary classes to aid in the identification and tracking of elements associated with rocket launches. The classes are defined as follows:
- Engine Flames: Captures the flames produced by the rocket’s engine during launch. This class is crucial for identifying engine activation and operation.
- Rocket Body: Represents the main body of the launch vehicle, including all structural sections of the rocket.
- Space: Refers to the rocket after it has ascended into space, typically depicted as a distant point in the image.
The most recent version of the Rocket Detect dataset is extensive, comprising over 28,000 images. To prevent extended kernel sessions in Colab, we will utilize version 36 of the dataset, which includes 12,041 images.
# Installation of the Roboflow library
!pip install -q roboflow

# Importing the Roboflow library
import roboflow

# Authentication to Roboflow
roboflow.login()  # Note: Make sure to set up your Roboflow API key before calling login()

# Initializing the Roboflow client
rf = roboflow.Roboflow()

# Download the dataset
project = rf.workspace("nasaspaceflight").project("rocket-detect")
dataset = project.version(36).download("yolov9")
In this block, we are installing the Roboflow library using !pip install -q roboflow. Following this, we authenticate in Roboflow by executing roboflow.login(), which necessitates an API key that should be set beforehand.
Next, we instantiate the Roboflow client with rf = roboflow.Roboflow(). To prepare our dataset for YOLOv9, we identify our project within the Roboflow workspace through project = rf.workspace("nasaspaceflight").project("rocket-detect"), and then we download version 36 of the dataset, which is specifically formatted for YOLOv9, using dataset = project.version(36).download("yolov9").
Train the YOLOv9 Model
For training the YOLOv9 model, we’ll utilize the Command Line Interface (CLI). It’s important to familiarize ourselves with the command and its parameters before initiating the training process.
Below is an example of a training command that employs the GELAN-C architecture:
!python train.py \
--batch 16 --epochs 20 --img 640 --device 0 \
--data {dataset.location}/data.yaml \
--weights {WEIGHTS_FOLDER}/gelan-c.pt \
--cfg models/detect/gelan-c.yaml
Let’s break down the command line arguments we will use:
--batch: The batch size for data loader. It can be adjusted based on the available GPU memory.--epochs: Number of epochs we want to train for.--img: Defines the image size, standardizing the input size for model training.--device: Assigns training to run on the device with ID 0, typically indicating the first GPU.--data: Path to the dataset YAML file.--weights: Specifies the initial weights for training.--cfg: Indicates the configuration file to use.
Your model will start training. Once it has finished, the results of each training session will be automatically stored in {CODE_FOLDER}/runs/train/.
from prettytable import PrettyTable
import time

# Path of the directory you want to list
directory_path = f'{CODE_FOLDER}/runs/train/exp'

# Create a pretty table
table = PrettyTable()
table.field_names = ["Filename", "Size (KB)", "Modification Date"]

# List files in the directory
for filename in os.listdir(directory_path):
    filepath = os.path.join(directory_path, filename)
    if os.path.isfile(filepath):
        # Get the file size
        size = os.path.getsize(filepath) / 1024  # Size in KB
        # Get the modification date
        mod_time = os.path.getmtime(filepath)
        mod_time = time.strftime('%Y-%m-%d %H:%M:%S', time.localtime(mod_time))
        # Add row to the table
        table.add_row([filename, f"{size:.2f}", mod_time])

# Sort the table by filename (optional)
table.sortby = "Filename"

# Display the table
print(table)
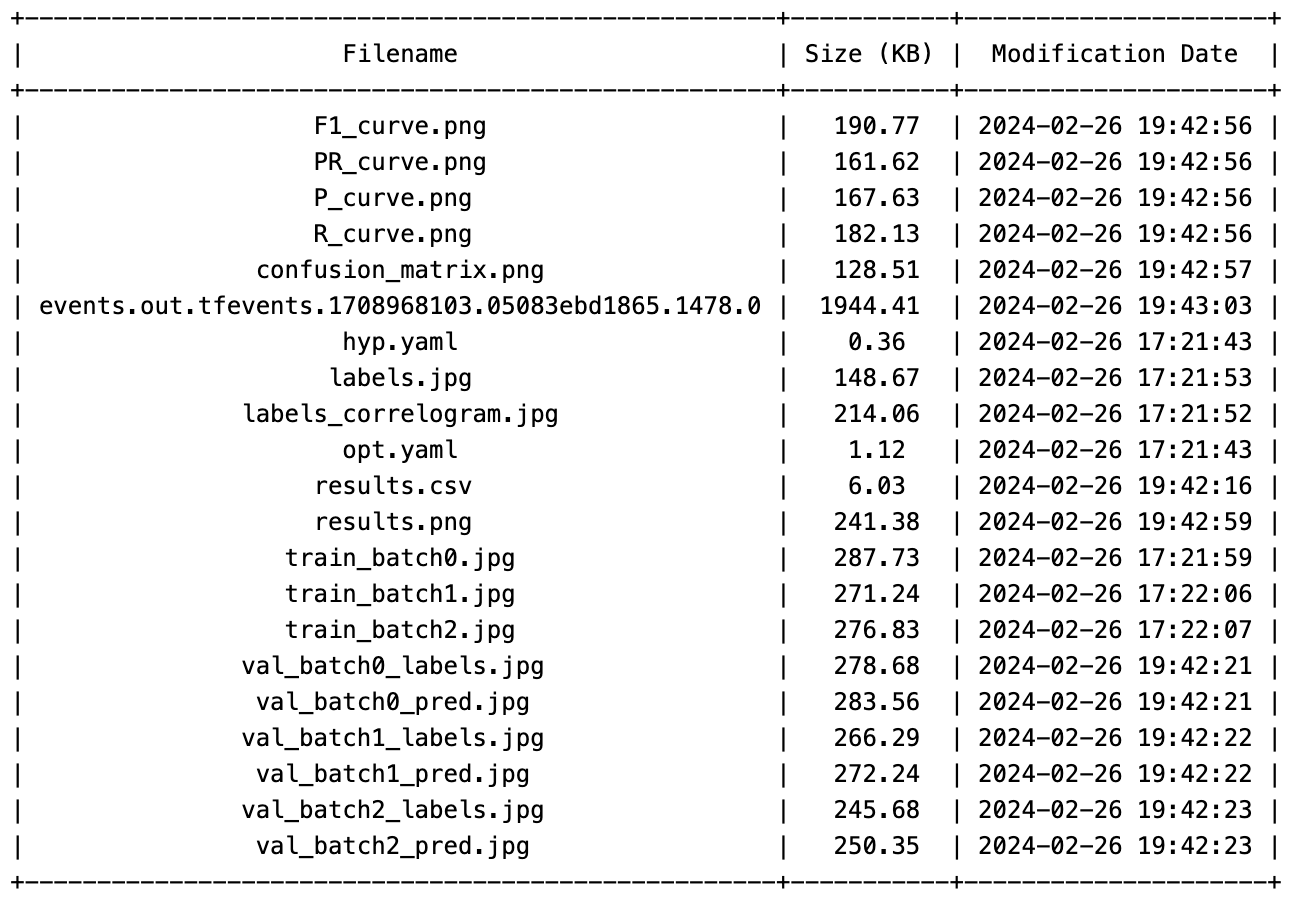
YOLOv9 generates numerous files in the output directory. To review these files, you can easily navigate through the directory and modify the filename in the command below as needed to access specific files.
# Path to the 'results.png' image
results_image_path = f'{CODE_FOLDER}/runs/train/exp/results.png'

# Display the image with a specific size
Image(filename=results_image_path, width=800)
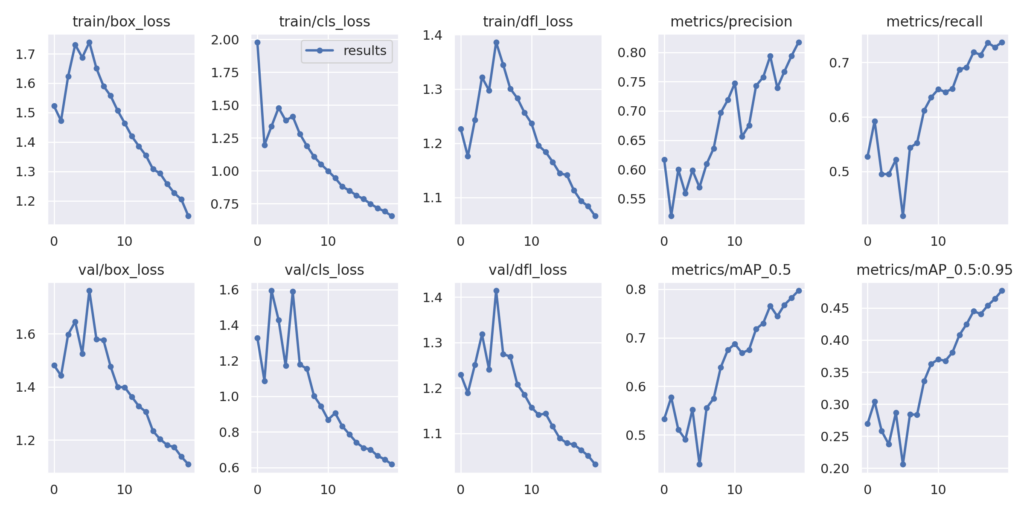
The model’s mAP at IoU=0.5 is 0.79724, showing strong detection performance at a moderate overlap criterion. The mAP across the IoU range from 0.5 to 0.95 is 0.47729, indicating good object detection across varying levels of strictness.
To evaluate the best model, use the following command.
!python val.py \
--img 640 --batch 32 --conf 0.001 --iou 0.7 --device 0 \
--data {dataset.location}/data.yaml \
--weights {CODE_FOLDER}/runs/train/exp/weights/best.pt
Saving and Loading Weights
During or after training in Google Colab, it’s common to encounter the challenge of disconnections after a period of inactivity or upon reaching the maximum continuous usage limit.
To mitigate this problem and ensure continuity of work, as we are using Google Colab environment, it’s recommended to save the weights of the trained model to Google Drive.
How to Save Weights to Google Drive
To securely save your model’s weights to Google Drive, we will run the following code.
# from google.colab import drive
# import shutil

# Mount Google Drive
drive.mount('/content/drive')

# Define the source and destination paths
source_path = f'{CODE_FOLDER}/runs'
destination_path = '/content/drive/MyDrive/yolov9-rocket-detect'

# Check if the destination directory exists; if so, remove it
if os.path.exists(destination_path):
    shutil.rmtree(destination_path)

# Copy the content from Google Drive to the Colab environment
shutil.copytree(source_path, destination_path)
print("Training weights copied to Google Drive successfully.")
To begin, you must mount Google Drive in the Colab environment. This is accomplished by using the google.colab library and invoking drive.mount('/content/drive'), which prompts you for authentication.
Next, determine the source path and the destination path on Google Drive. The shutil.copytree(source_path, destination_path) function is then used to copy the entire directory structure from the source to the destination.
How to Load Weights from Google Drive
To load the saved weights into your model for inference, follow these steps:
from google.colab import drive
import shutil

# Mount Google Drive
drive.mount('/content/drive')

# Define the source and destination paths
source_path = '/content/drive/MyDrive/yolov9-rocket-detect'
destination_path = f'{CODE_FOLDER}/runs'

# Check if the source contains the necessary files
if os.path.exists(source_path):
    shutil.copytree(source_path, destination_path, dirs_exist_ok=True)
    print("Training weights loaded from Google Drive successfully.")
else:
    print("Weights directory not found on Google Drive.")
Mount Google Drive in your Colab environment using drive.mount('/content/drive'), mirroring the steps taken during the saving process but with inverted source and destination paths. Utilize shutil.copytree(source_path, destination_path, dirs_exist_ok=True) to transfer the weights back to your workspace.
Run Inference on SpaceX footage
With a custom-trained YOLOv9 model, performing inference on raw footage from SpaceX rocket launches is now possible.
# Download the test footage
!wget -P {DATA_FOLDER} https://github.com/carlosfab/visao-computacional/raw/main/data/Falcon_9_USSF_124.mp4

# Run inference on the custom model
!python detect.py \
  --img 1280 --conf 0.1 --device 0 \
  --weights {CODE_FOLDER}/runs/train/exp/weights/best.pt \
  --source {DATA_FOLDER}/Falcon_9_USSF_124.mp4
To initiate inference, we use the detect.py script, specifying our model’s best weights located at {CODE_FOLDER}/runs/train/exp/weights/best.pt.
For viewing the processed video in Colab, the moviepy library offers a convenient method.
from moviepy.editor import VideoFileClip

# Path to the processed video
processed_video_path = f"{CODE_FOLDER}/runs/detect/exp/Falcon_9_USSF_124.mp4"

# Load the video using MoviePy
clip = VideoFileClip(processed_video_path)

# Display the video in the notebook with adjusted width
clip.ipython_display(width=600)
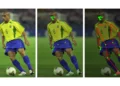
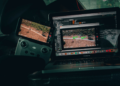
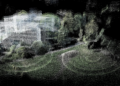
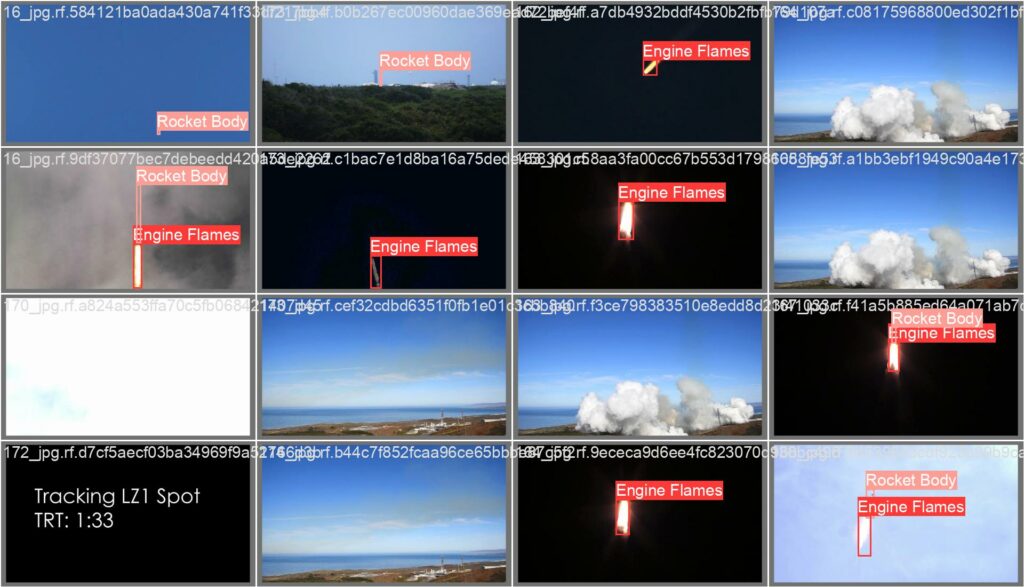
Here, we showcase two examples from our rocket detector model, tested on SpaceX’s raw footage.
Our model impressively recognizes the engine flames and the rocket’s body. I**t even accurately detects the rocket when it becomes a mere speck in the distance.
Takeways
- YOLOv9’s Advancements: The introduction of YOLOv9, featuring Programmable Gradient Information and Generalized Efficient Layer Aggregation Network, represents a significant leap in object detection technology.
- Training on Custom Data: The guide outlines a comprehensive approach to training YOLOv9 on a custom dataset, emphasizing the process from dataset preparation through to model training, specifically highlighting the example of tracking SpaceX launches.
- Roboflow’s Role: Utilization of Roboflow for dataset management underscores the efficiency gains in preparing data for training, showcasing its importance in streamlining the model training workflow.
- Saving and Loading Weights: Strategies for saving and loading model weights in the Google Colab environment are discussed, addressing potential disruptions in training sessions.
- Inference Insights: Demonstrating inference on SpaceX footage with a custom-trained YOLOv9 model showcases the model’s capability to detect and track specific elements effectively.
In this article, we had a detailed walkthrough to train the YOLOv9 model on a custom dataset. In the process, we also carried out a real-world training experiment for rocket detection and tracking.
If you decide to build upon this project, extend its capabilities, or train the model with another custom dataset, please share your experiences with me on LinkedIn.